Manage App Files
Files can be uploaded and used within the Application. The interface for App Files allows you to use, rename, delete, and perform more actions on a file that has been uploaded to the Application. App Files are useful in many scenarios, for example, if you need specific files to integrate Unity or D3 Visualizations onto the Page.
Note
It is recommended that you read the article listed below to improve your understanding of App Files.
Uploading App Files
To upload new App Files, follow the steps below:
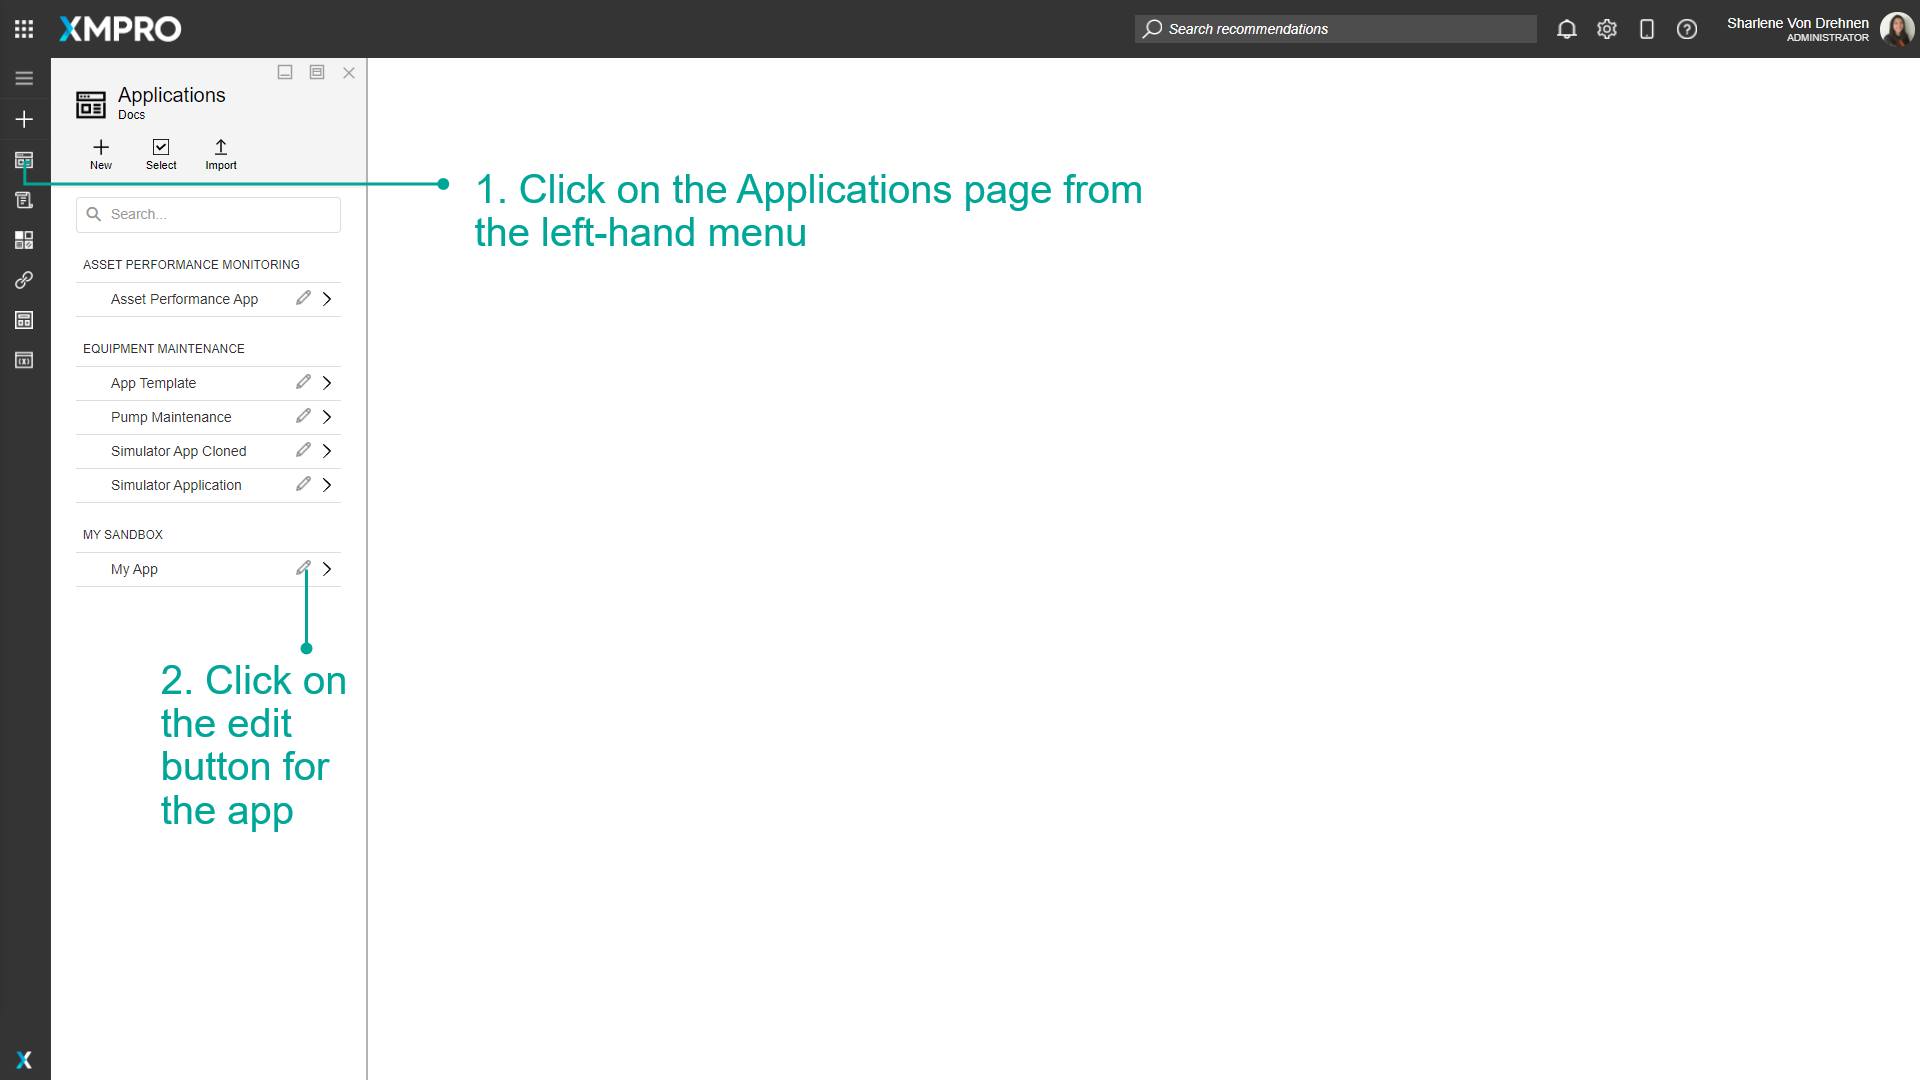
- Click on the Applications page from the left-hand menu.
- Click on the edit button for the App.
- Click on App Files.
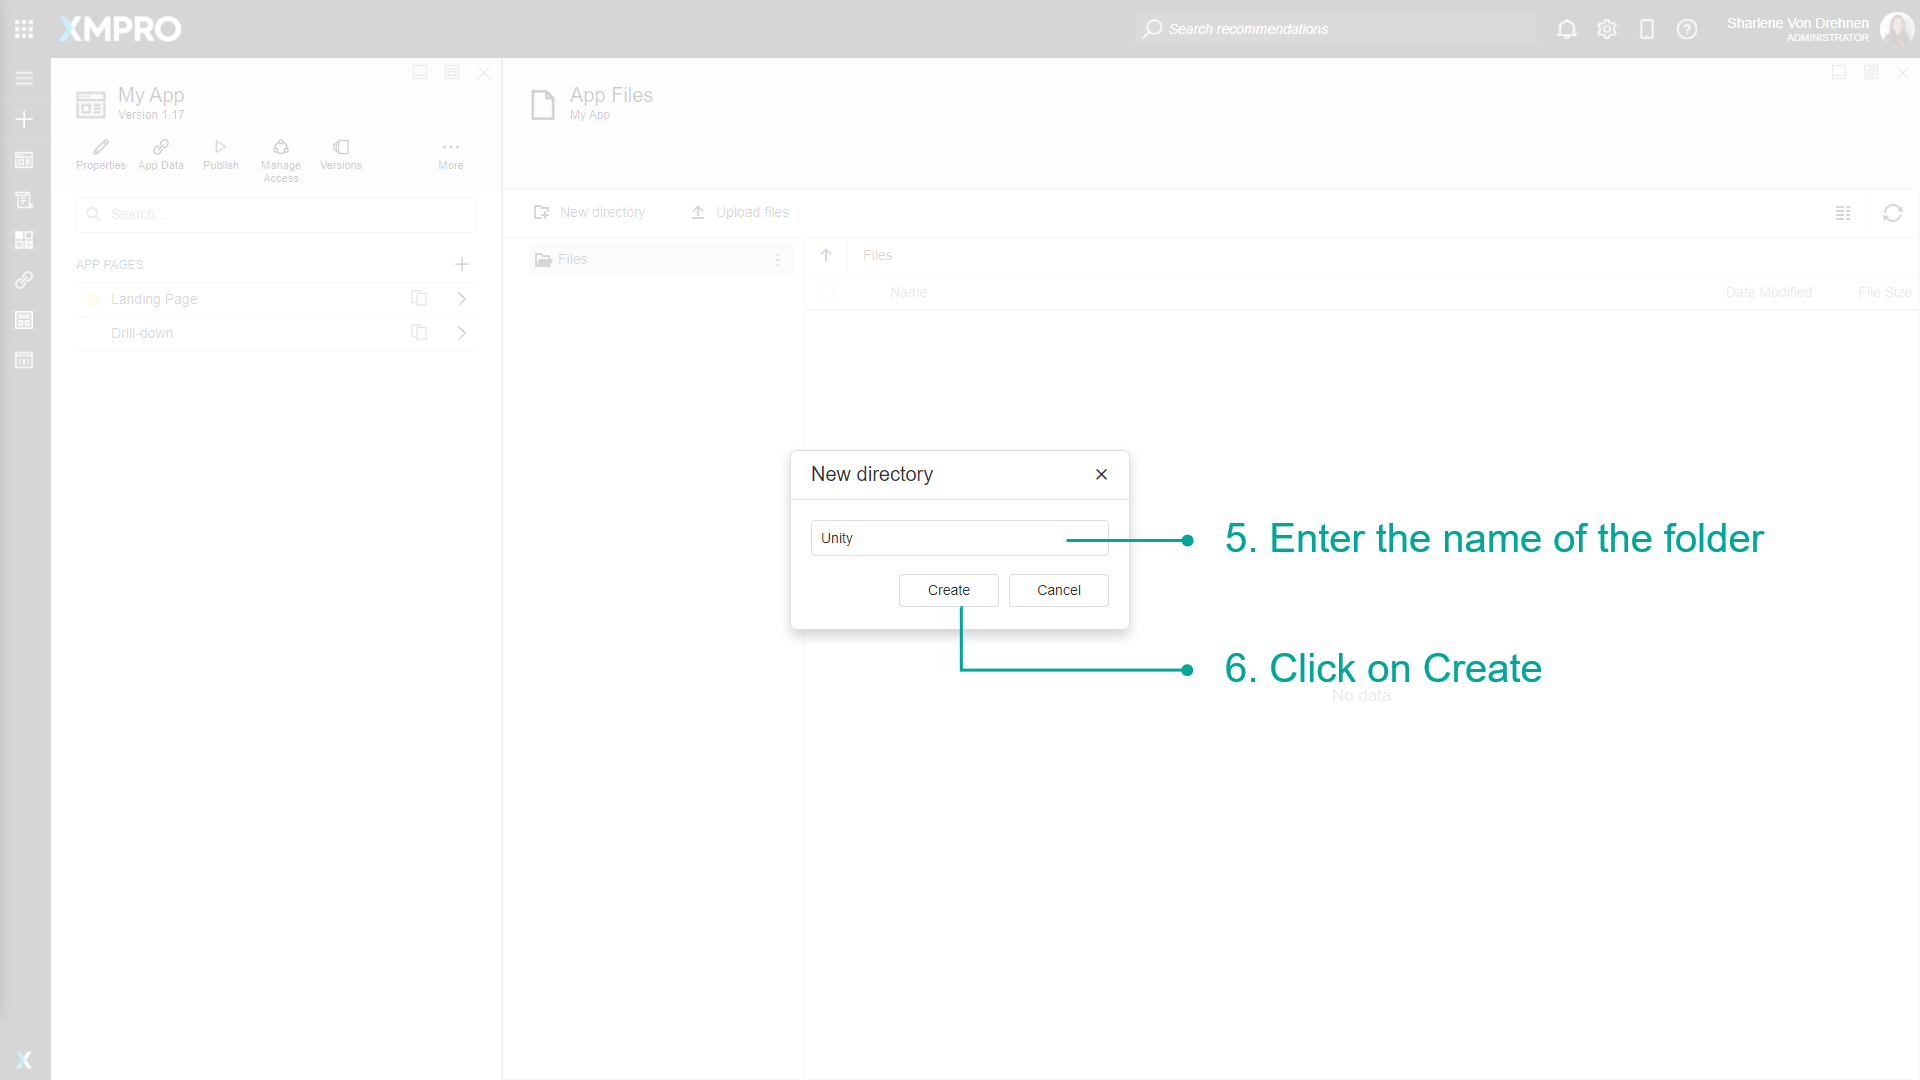
- Click on New Directory.

- Enter the name of the folder.
- Click on Create.
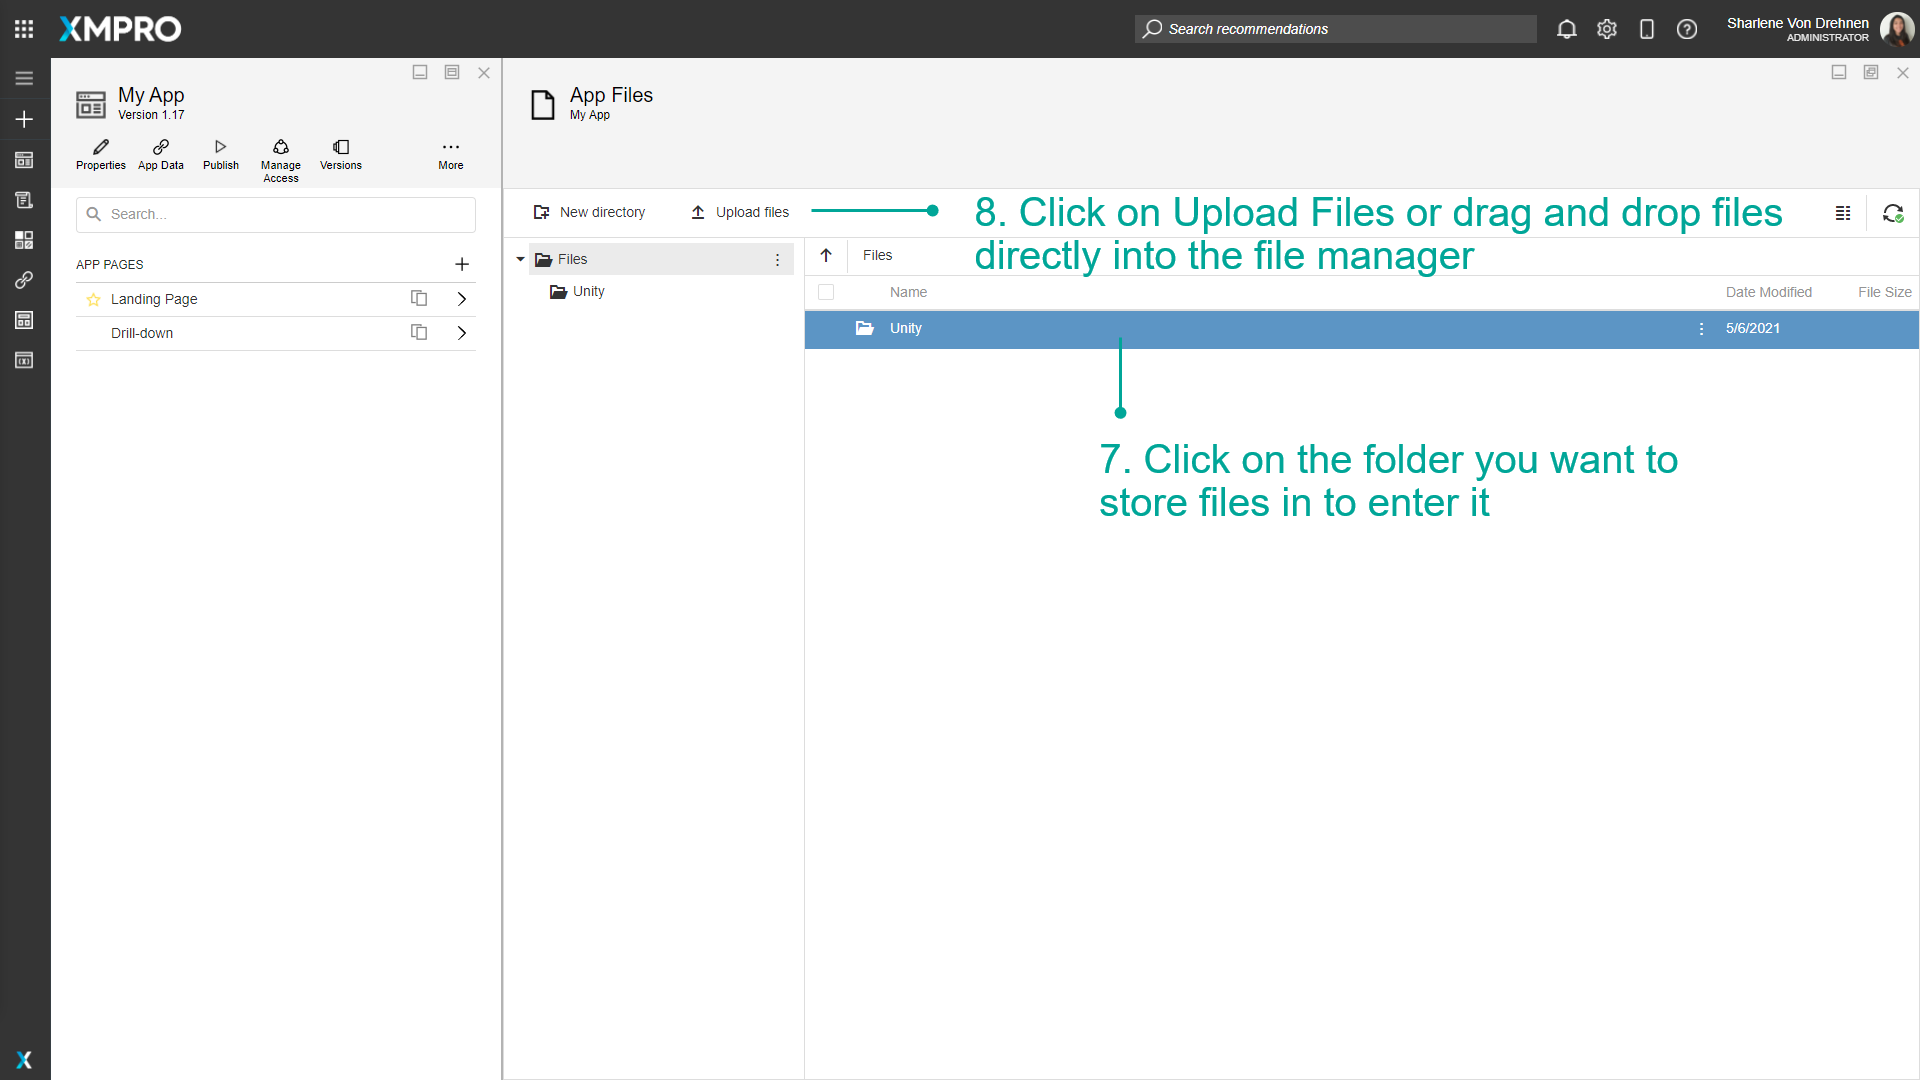
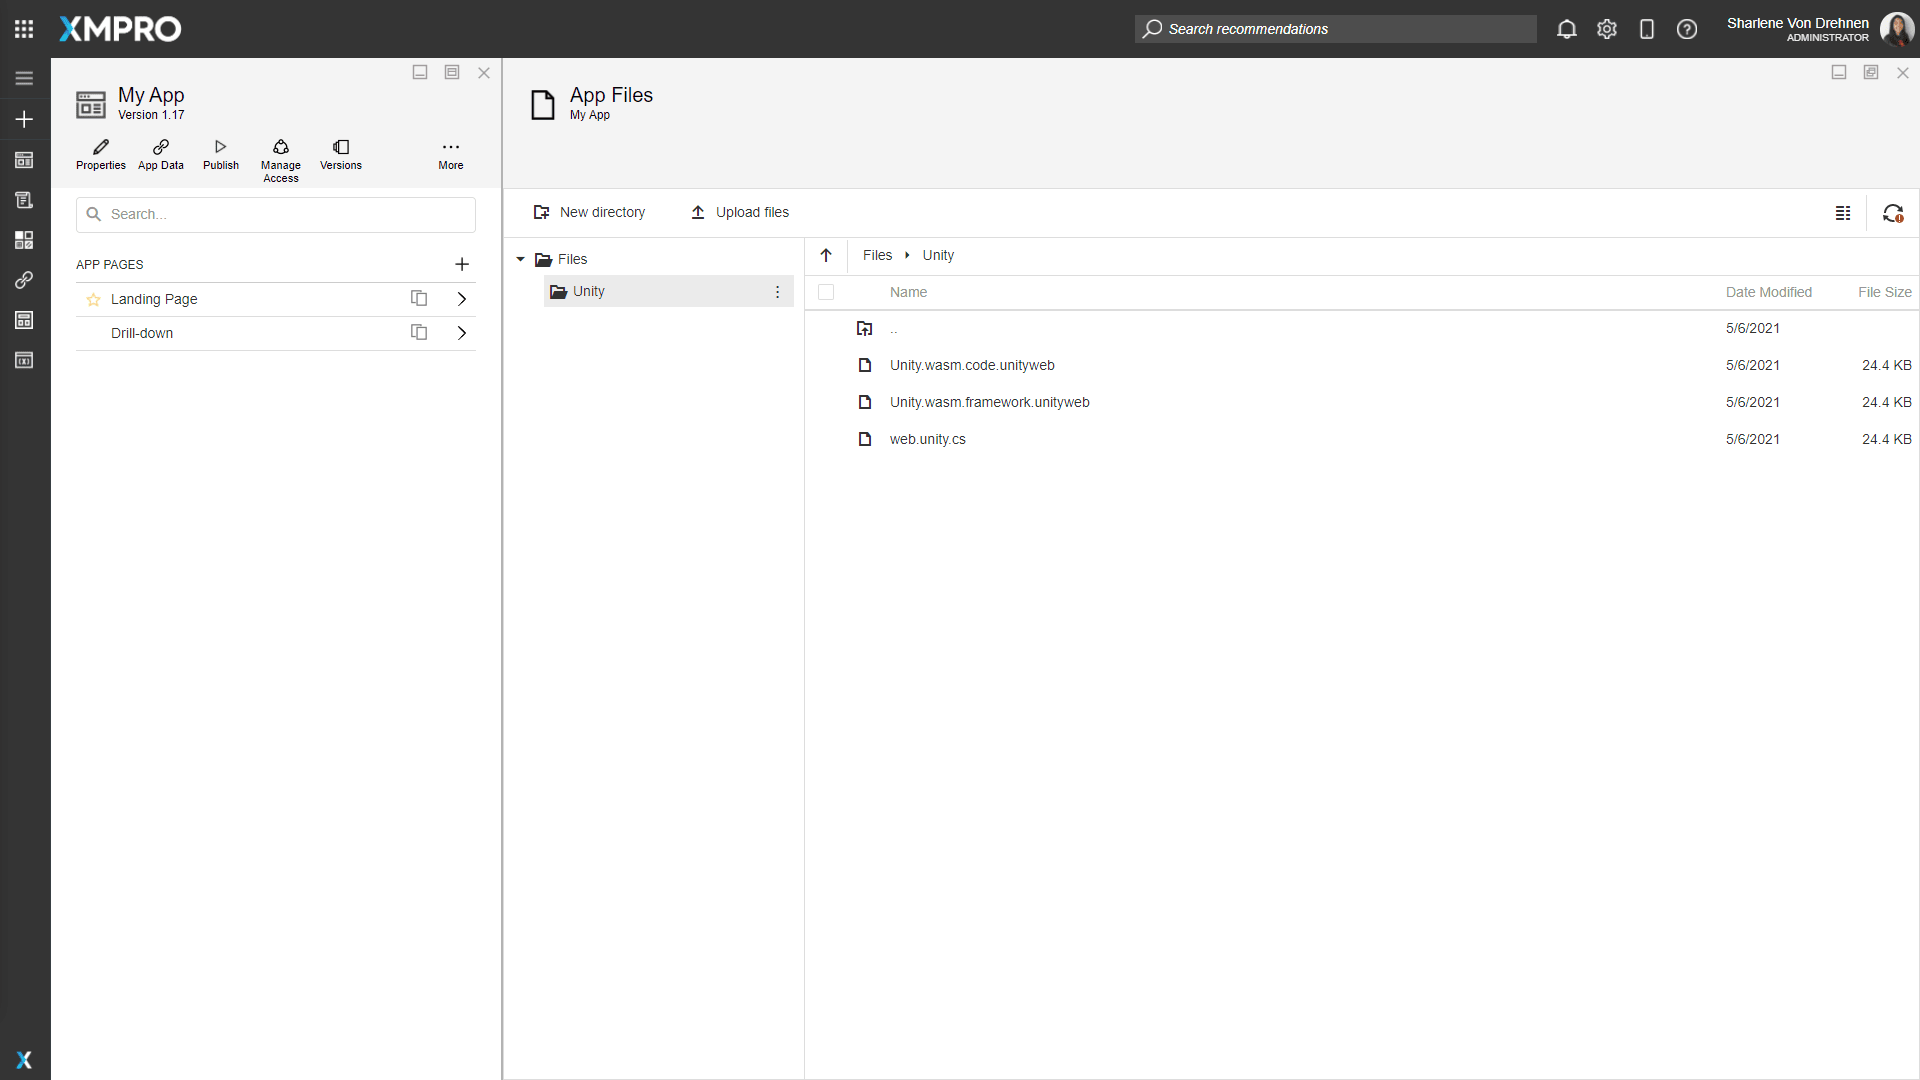
- Click on the folder you want to store files in to enter it.
- Drag and Drop Files into the file area or Click Upload Files.
Copying/Moving App Files around
To copy or move App Files to different folders, follow the steps below:
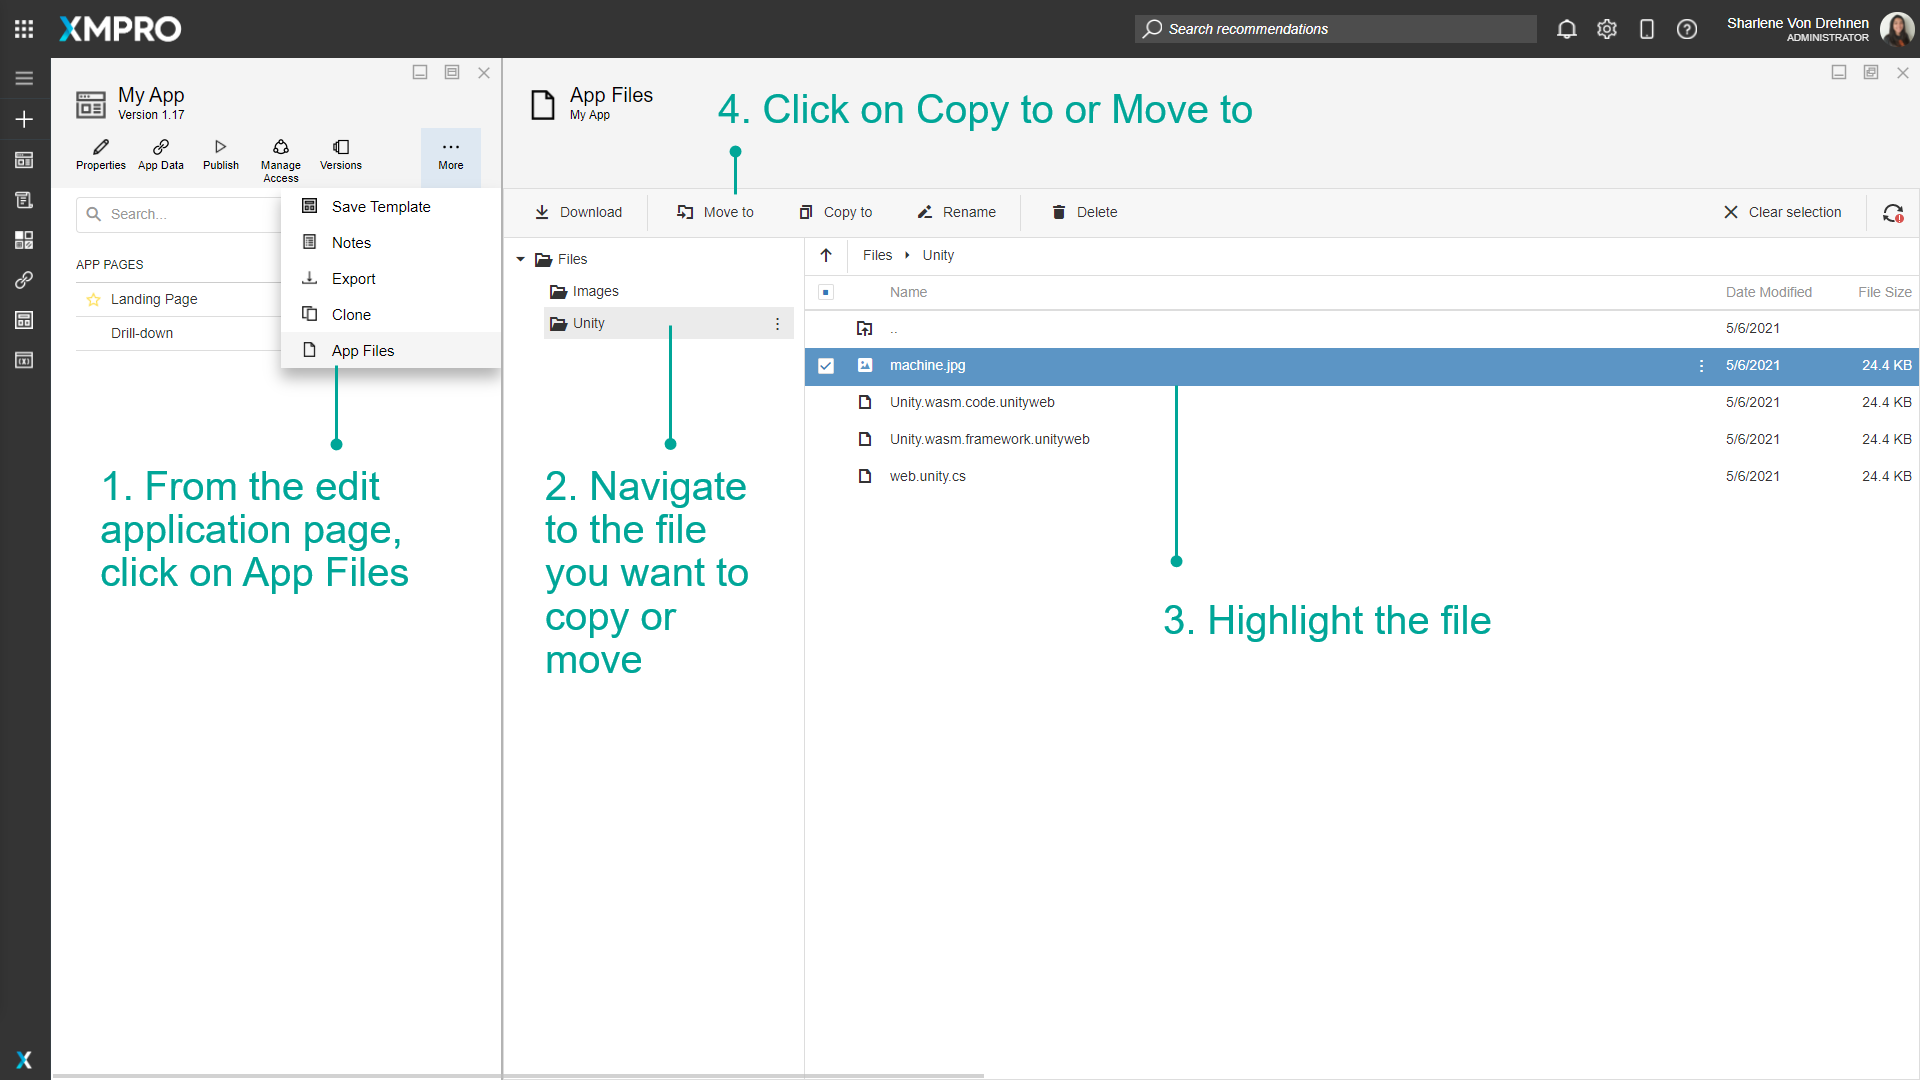
- From the edit application page, click on App Files.
- Navigate to the file you want to copy or move.
- Highlight the file.
- Click on Copy to or Move to.
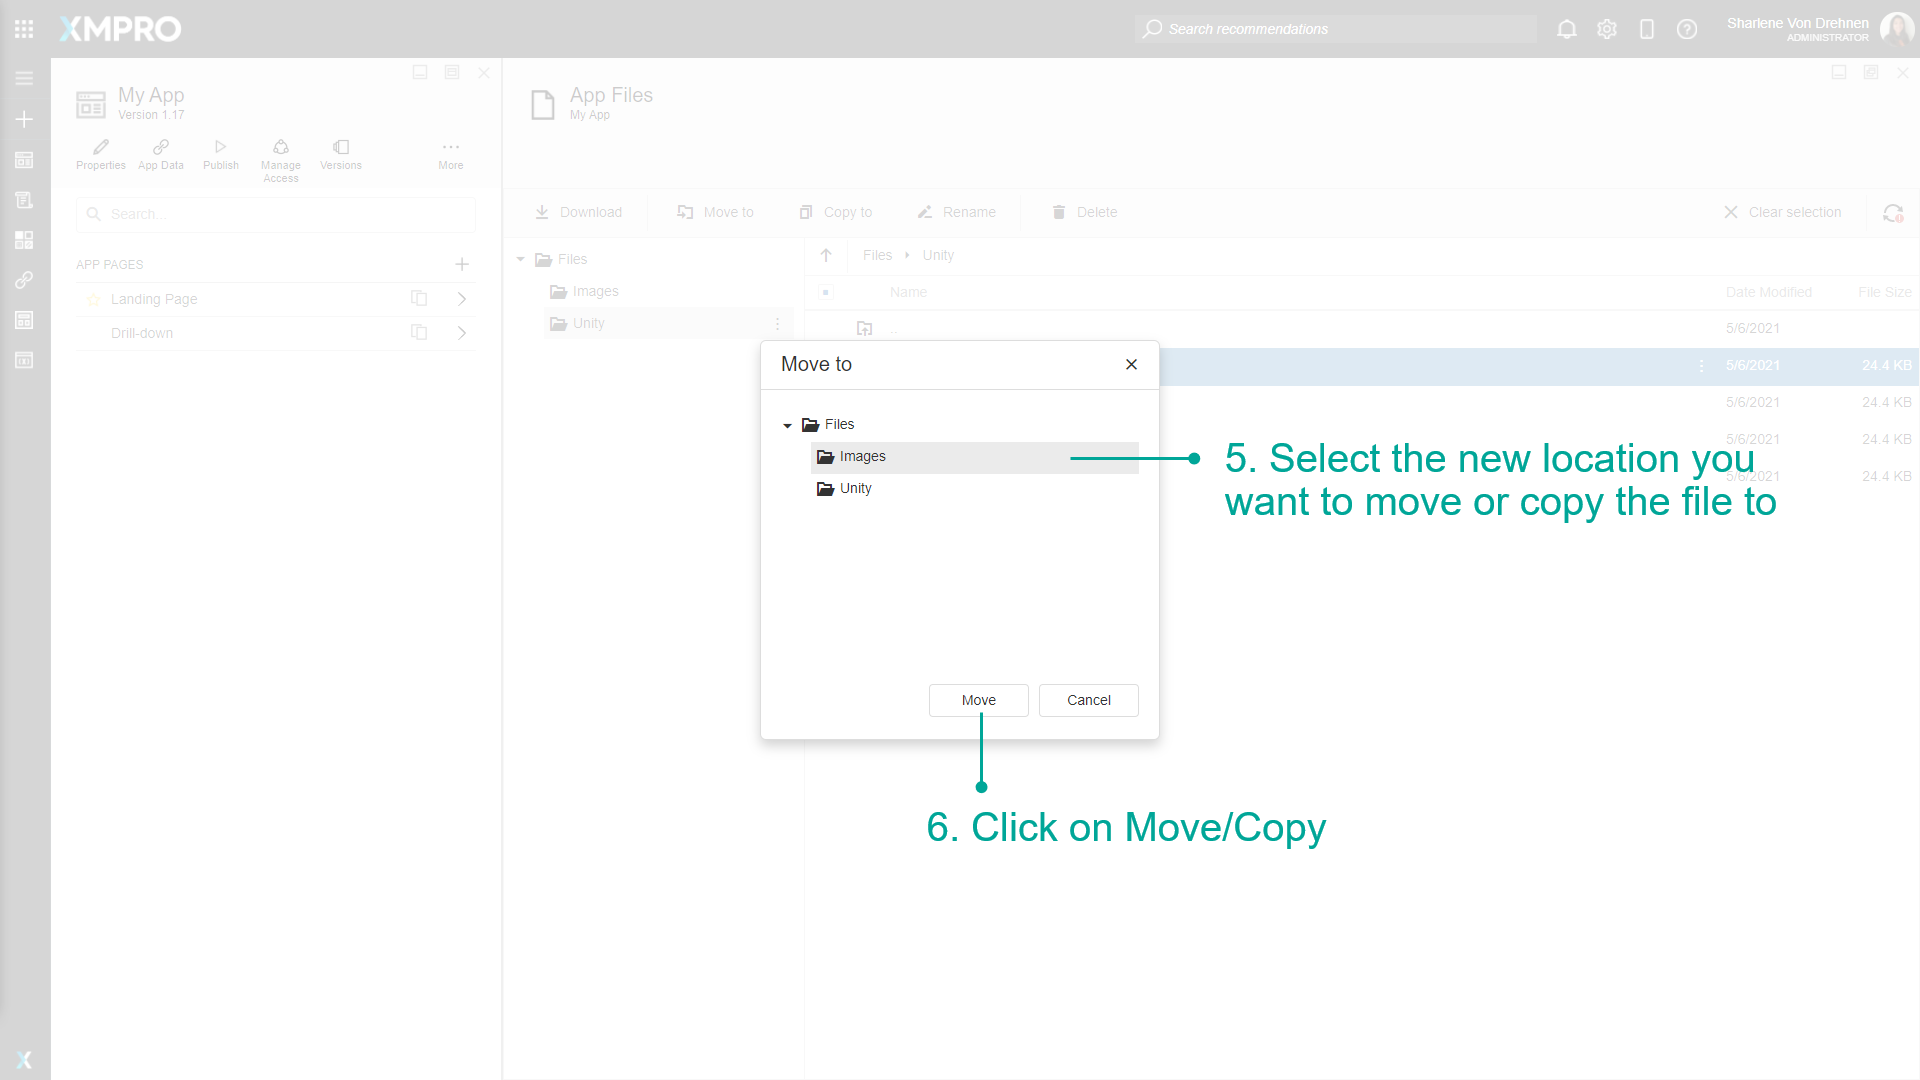
- Select the new location you want to move or copy the file to.
- Click on Move/Copy.
Renaming App Files
To rename App Files, follow the steps below:
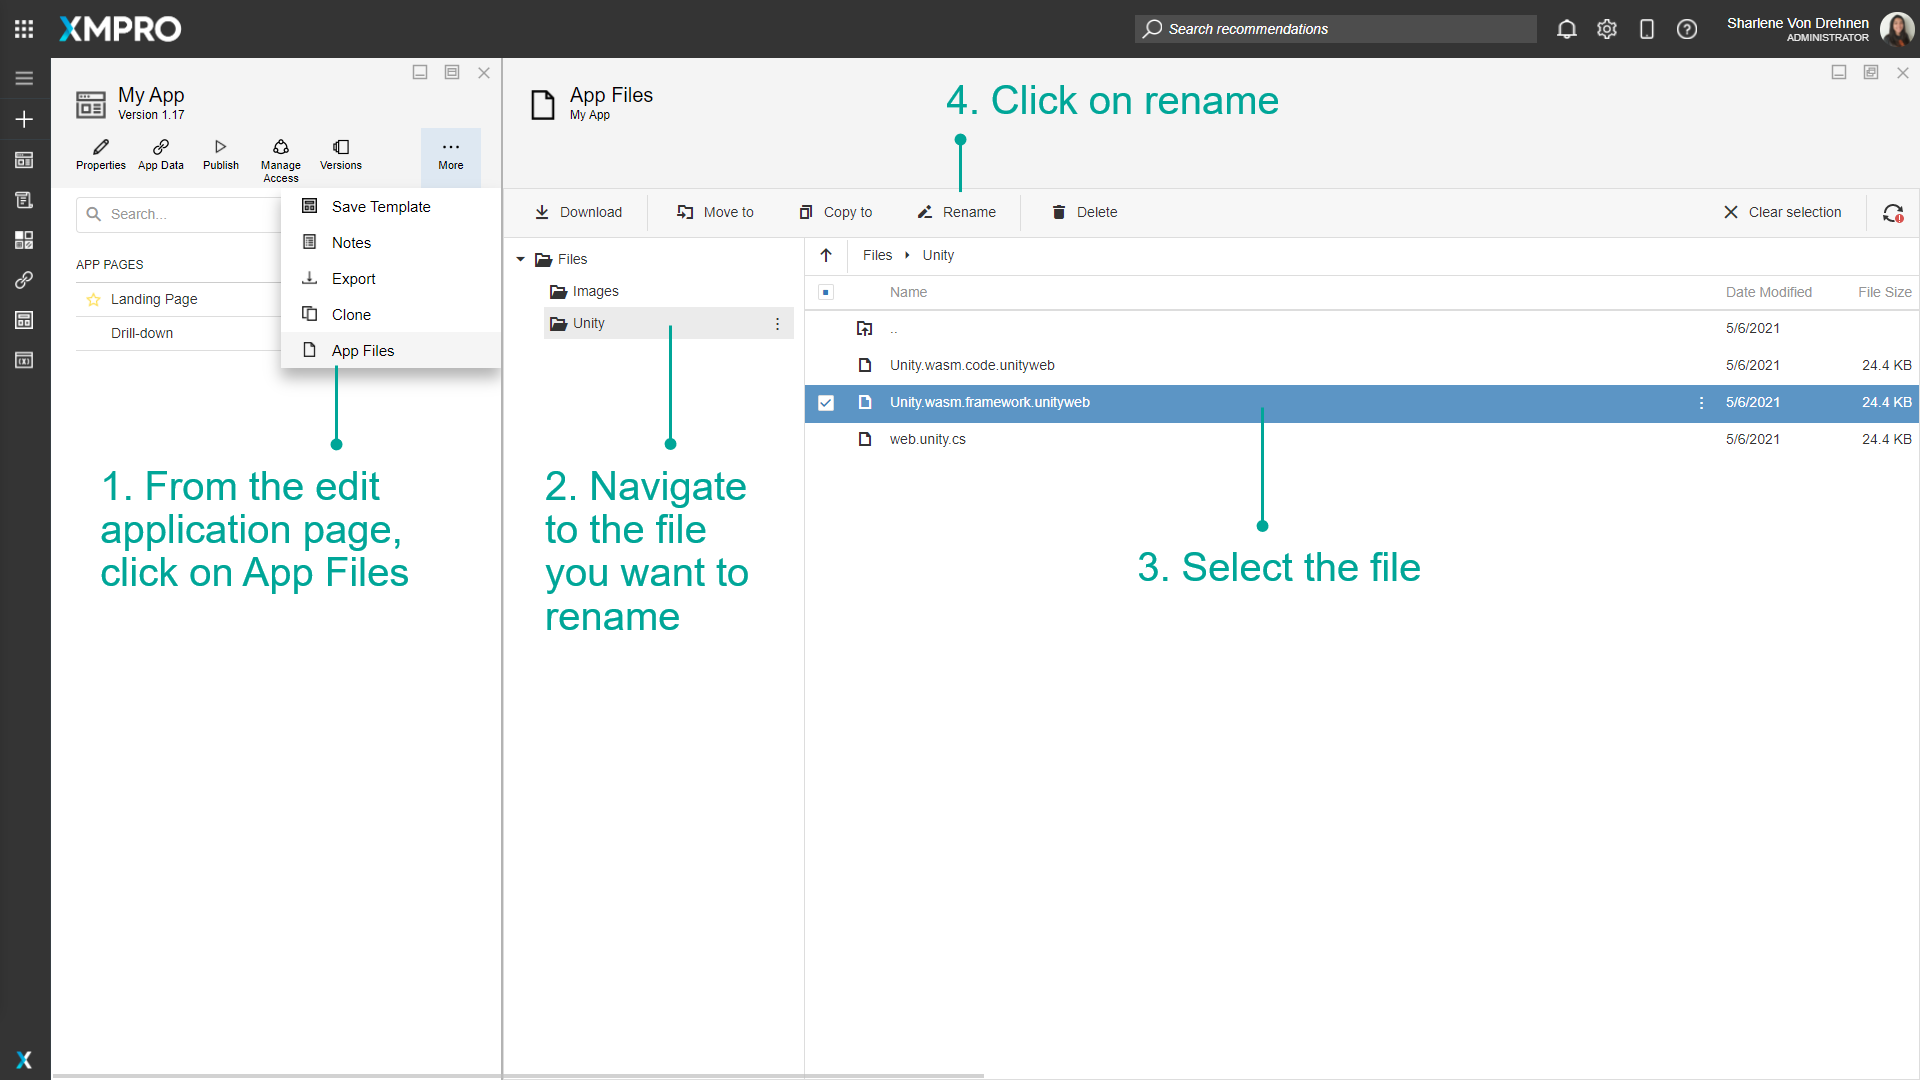
- From the edit application page, click on App Files.
- Navigate to the file you want to rename.
- Highlight the file.
- Click on rename.
- Enter a new name.
- Click on Save.

Deleting App Files
To delete App Files, follow the steps below:
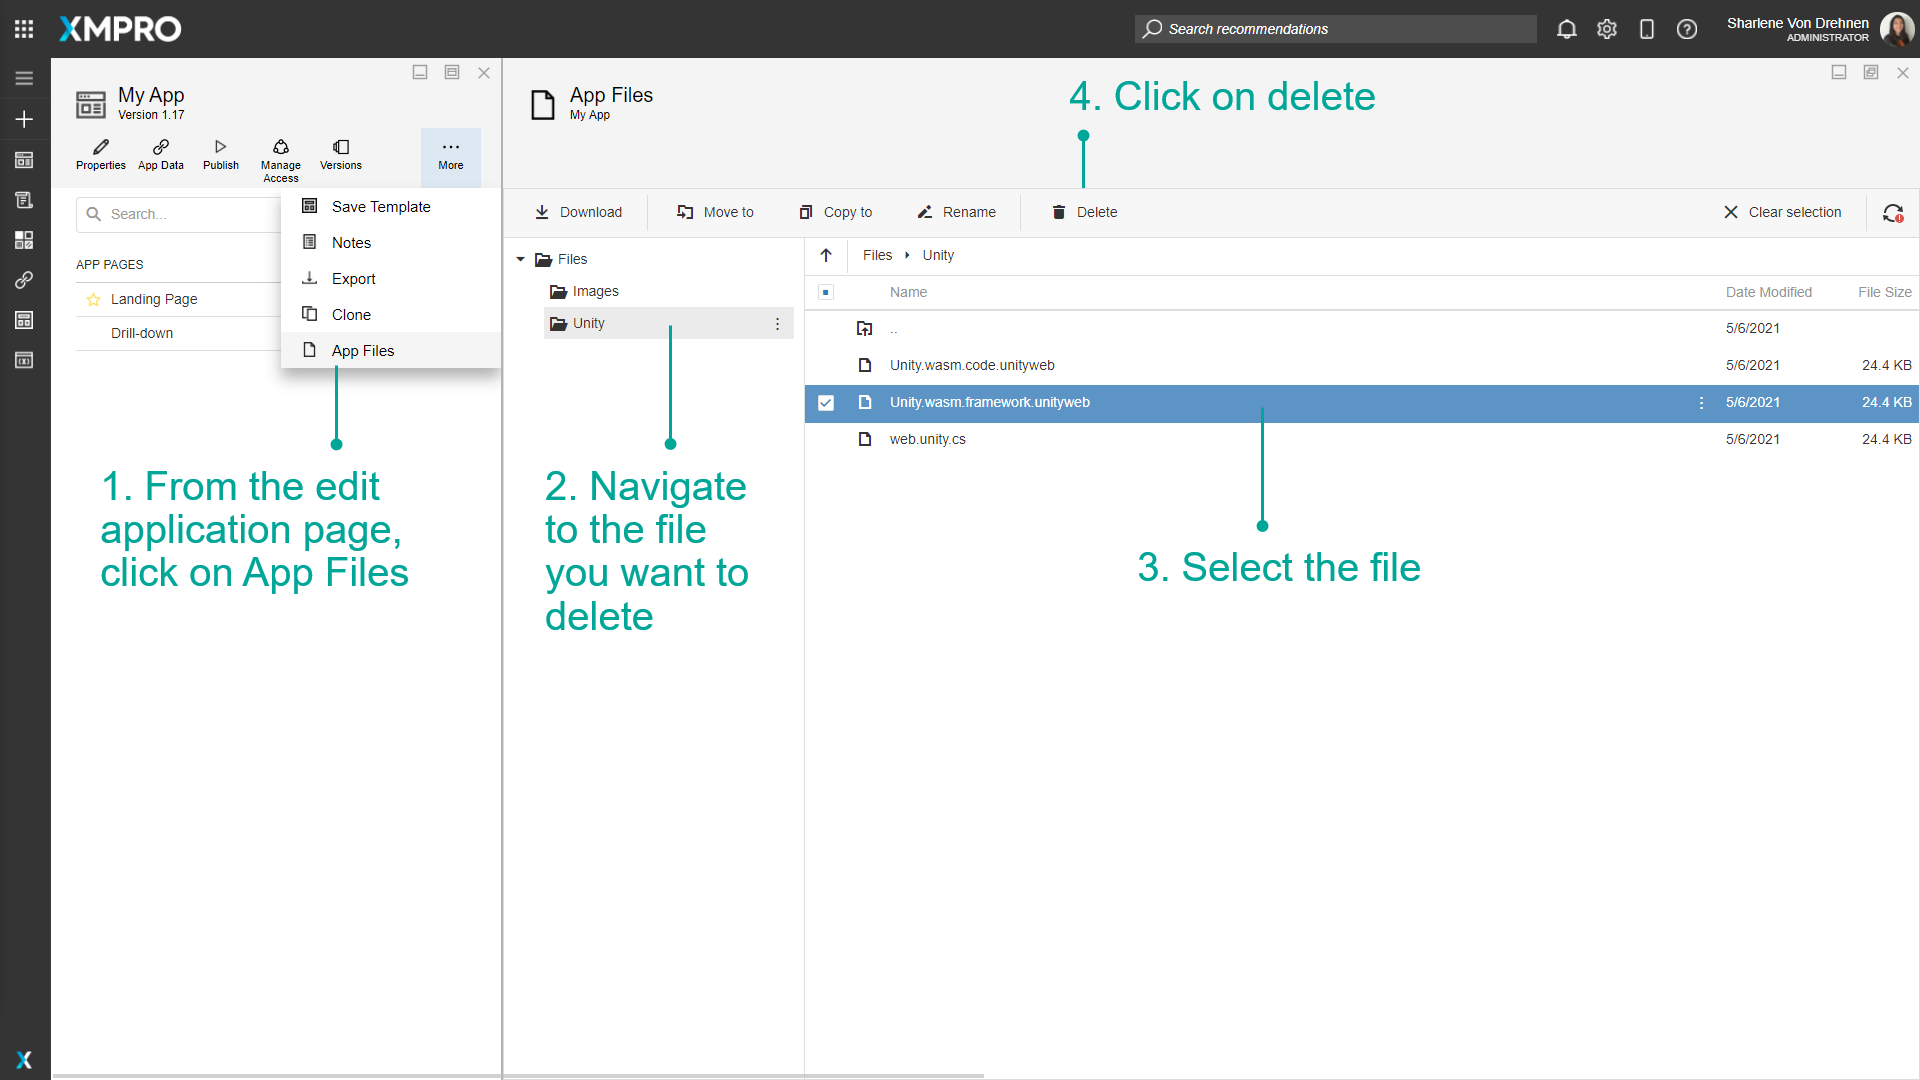
- From the edit application page, click on App Files.
- Navigate to the file you want to delete.
- Highlight the file.
- Click on delete.
- Confirm you want to delete the file.

Downloading App Files
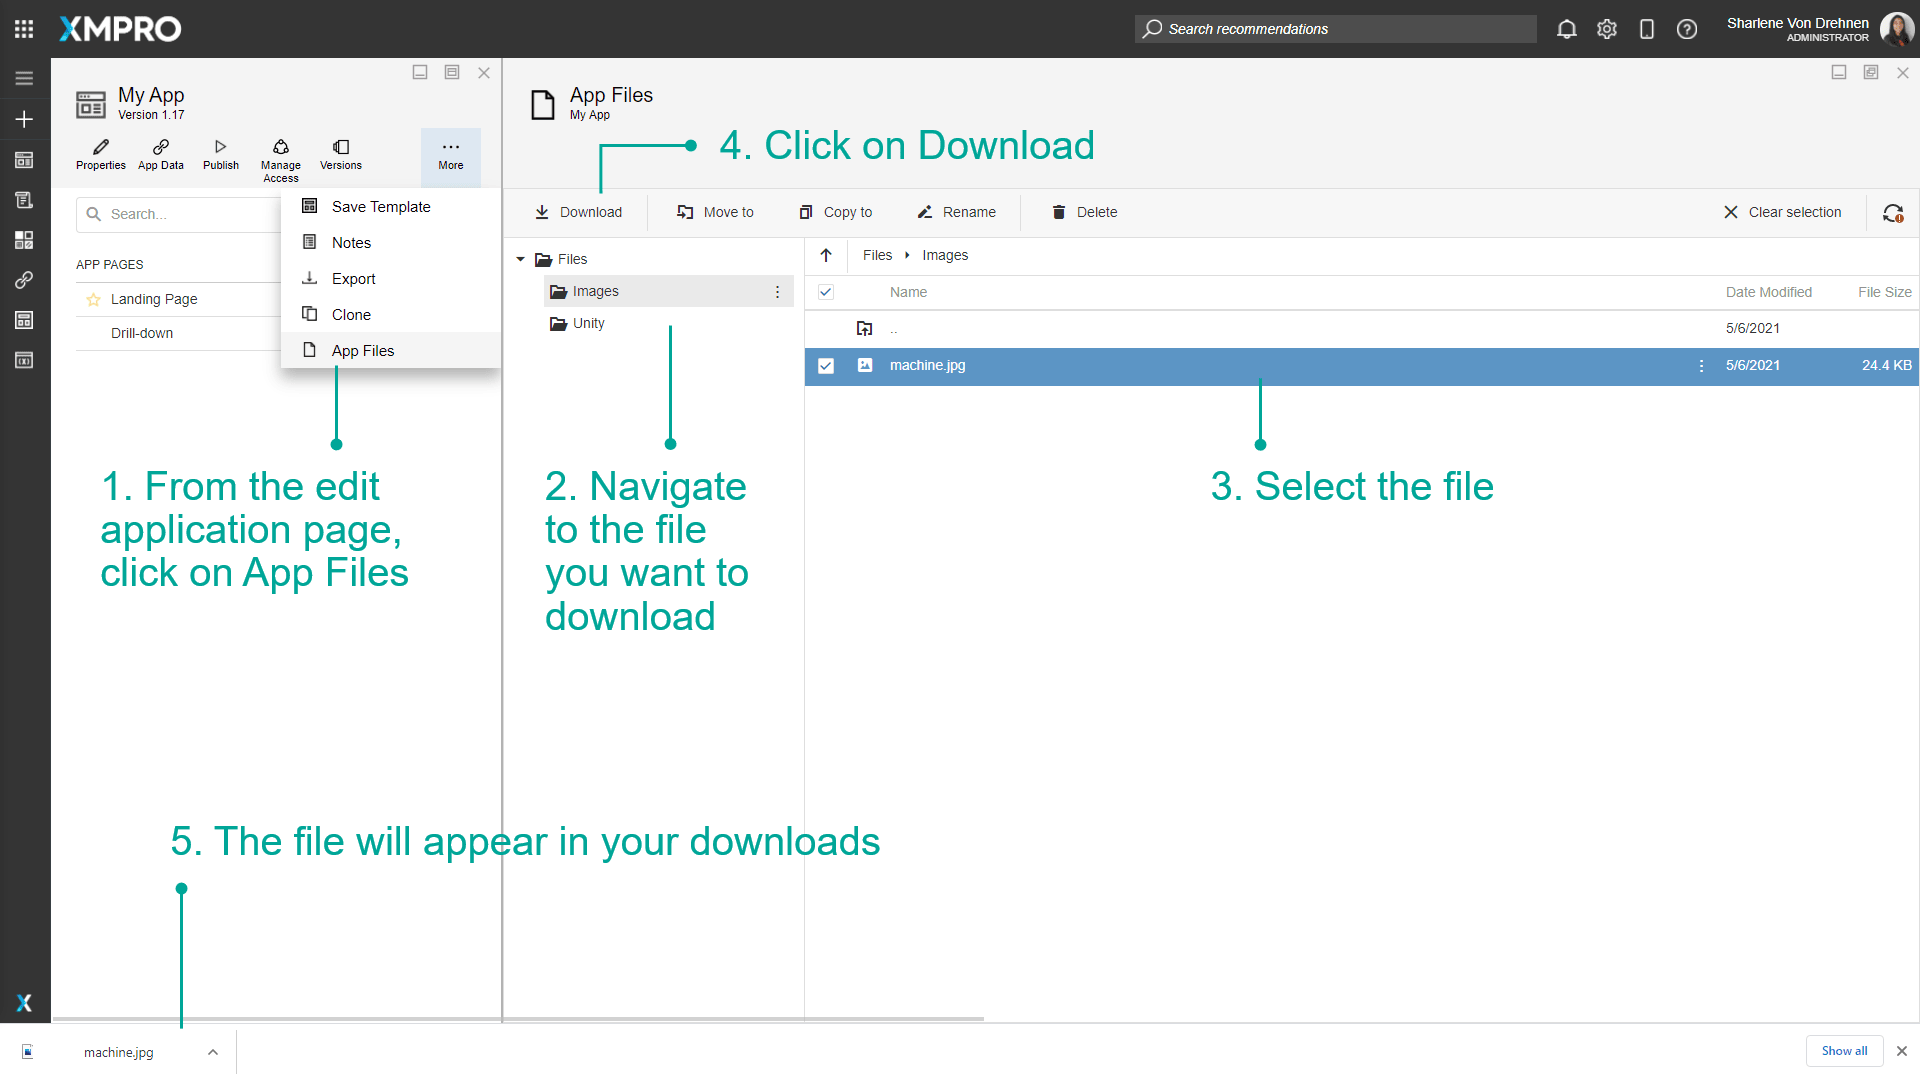
To download App Files, follow the steps below:
- From the edit application page, click on App Files.
- Navigate to the file you want to download.
- Highlight the file.
- Click on download.
- The file will appear in your downloads.
Using App Files
To use App Files in the application itself, follow the steps below:
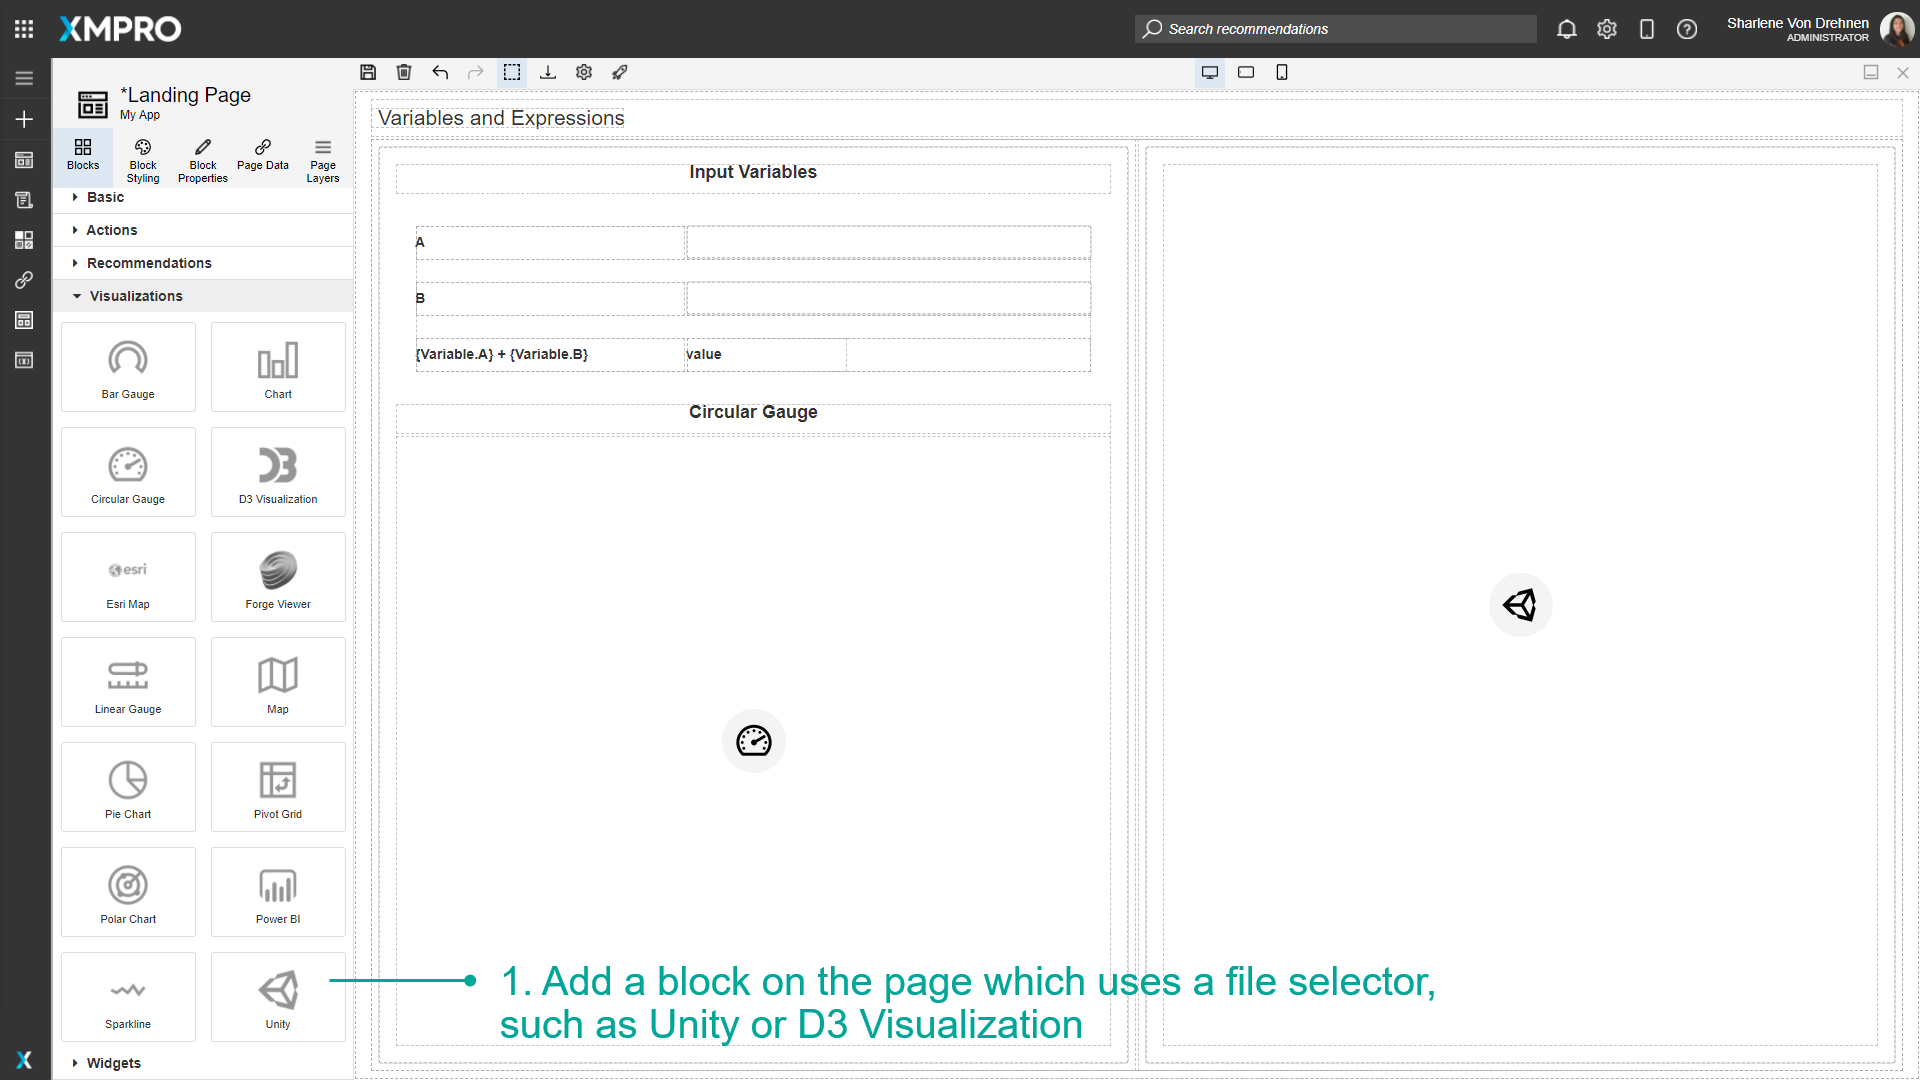
- Add a block on the page which uses a file selector, such as Unity or D3 Visualization.
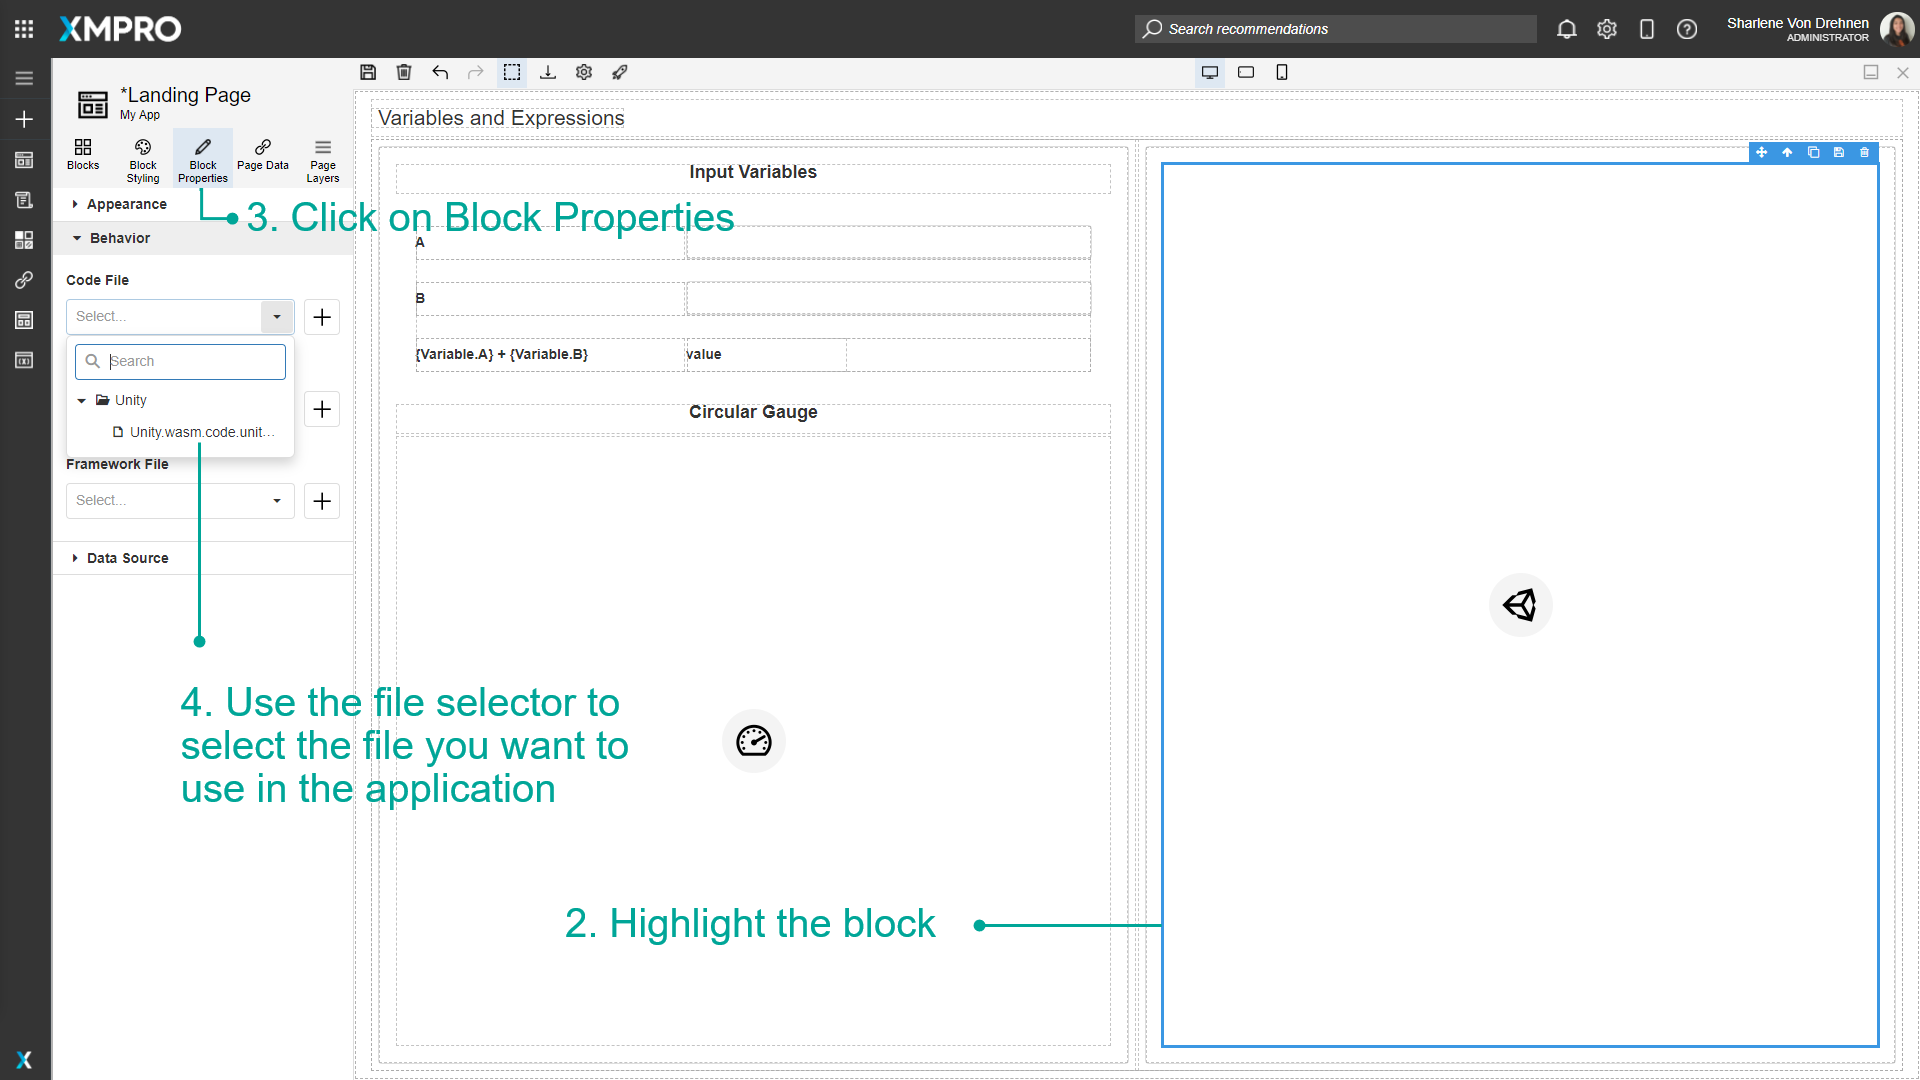
- Highlight the block.
- Click on Block Properties.
- Use the file selector to select the file you want to use in the application.
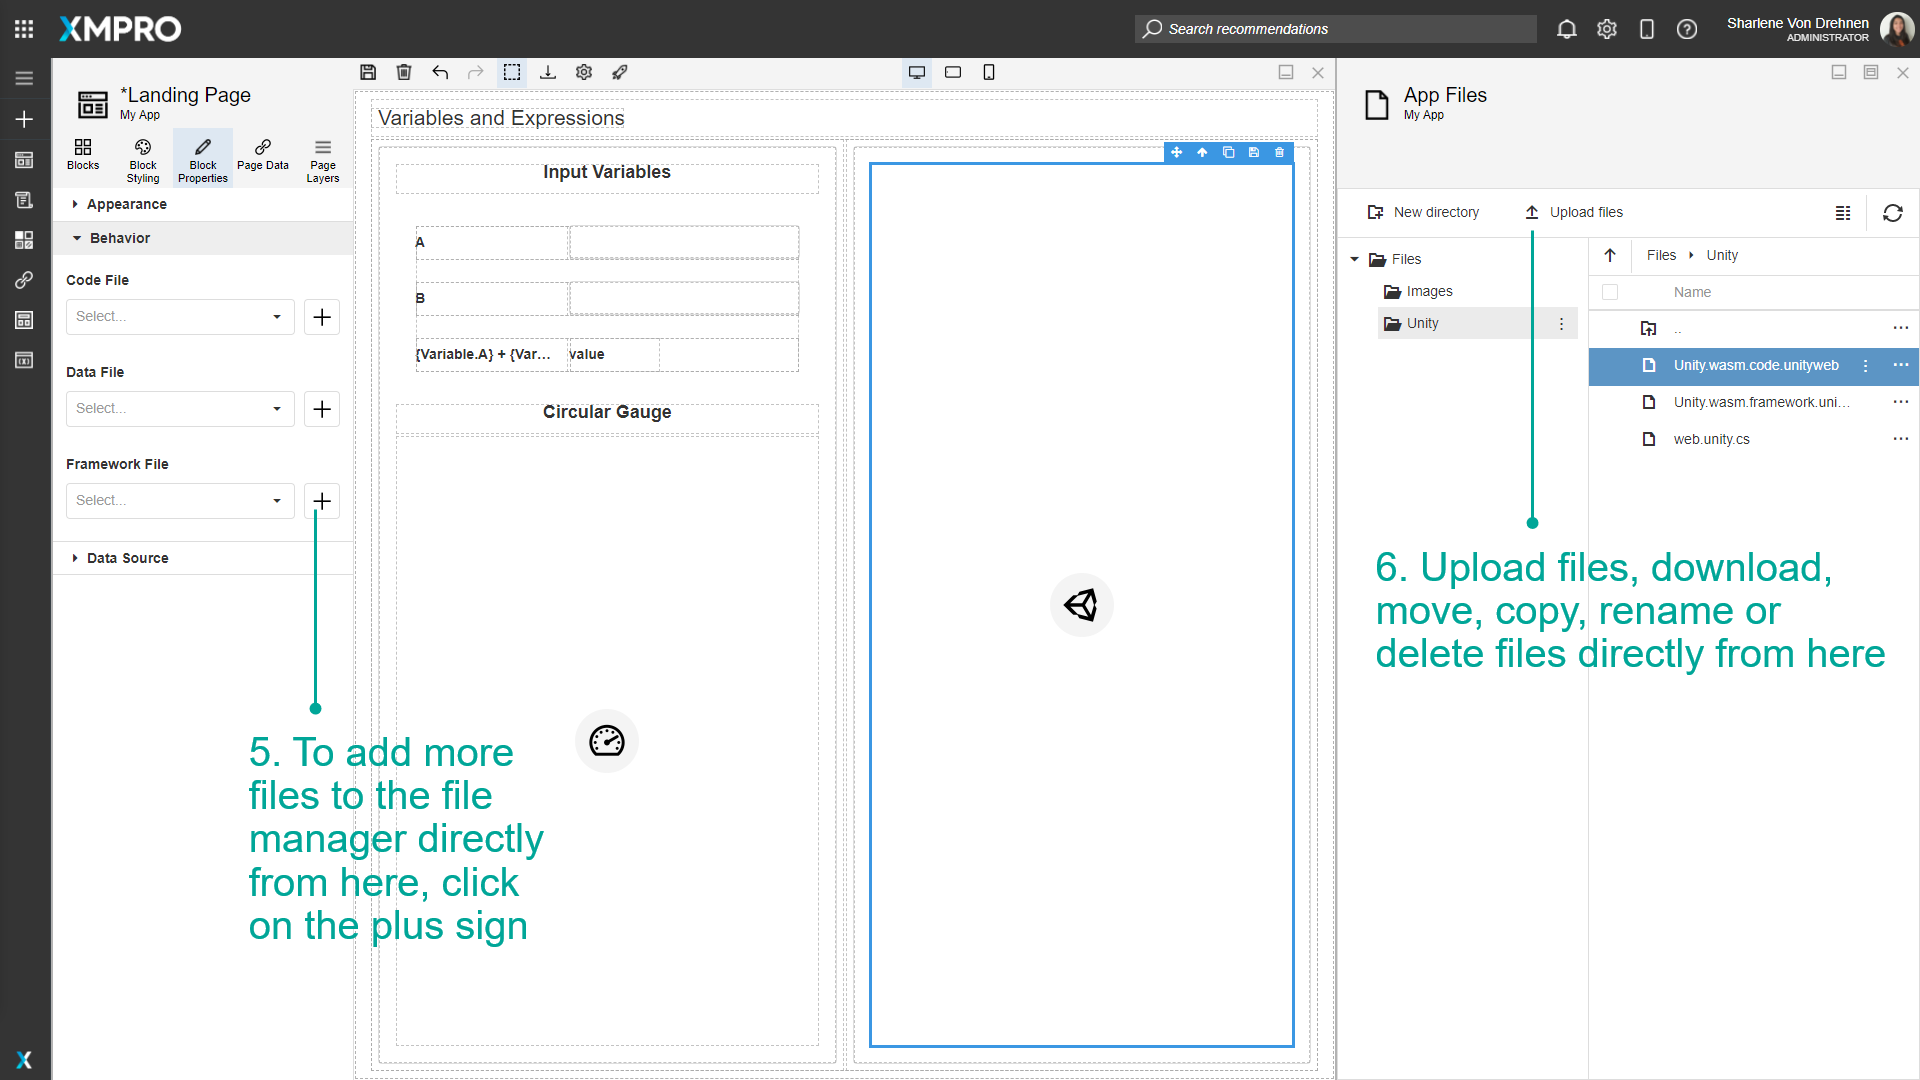
- To add more files to the file manager directly from here, click on the plus sign.
- Upload files, download, move, copy, rename or delete files directly from here.
Last modified: May 01, 2026